[ Show as SlideShow ]
Using SPMS Forms to Collect Information and Applications
Speaker: Ivan Andrian (ELETTRA)
The registration module can be used as a "forms builder" tool to create data entry screens, both account-related and not.
Registration Module
The SPMS Registration module is used to create registration pages for participants to a conference or event. It has several features, among which:
- use of registration pages to collect data
- automatic creating a list of participants
- several types of registration fees, multiple payments
- exhibition booths management
- external registration: pipe profile data to an external system and get confirmation back
Please note that this module is unmaintained: external registration is the recommended method.
It can be used to gather information from conference delegates before the conference, for example:
- Student Grant Applications
- Student Poster Registration
- Editorial Team Information Form
- Social Events Confirmations and Information
Form Elements
- Page: the data-entry form
- Fields: data-entry element for single information (of various types)
- Field groups: logical partitioning of fields
- Field order: defines the order of the fields in the page
- Field description/additional descriptive text: used to explain or give additional information to what is requested
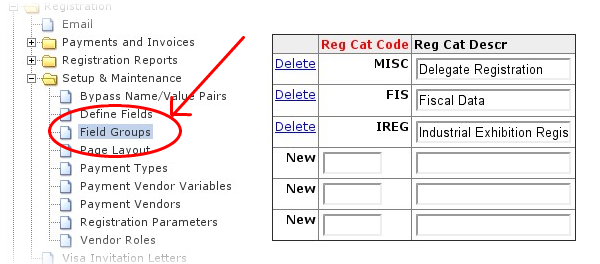
Field Groups
The default behavior of SPMS is to require Administrator privilege to create new field groups. New pages can be created, and form reports can be run, with Registration privilege.
Fields
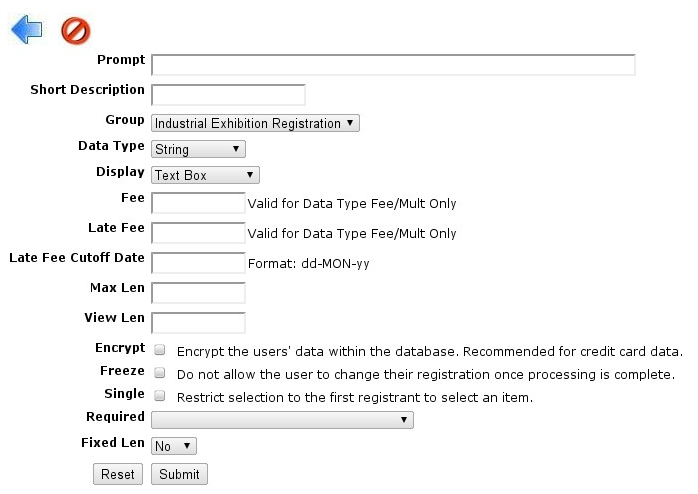
First select a group in which to create a new field and then select "New Data Field".
To define a field it is necessary to enter the following (only useful options are described):
- Prompt - the question that will be presented to the visitor, like "Will you attend the banquet?"
- Short Description - the label that will be used in Excel reports
- Data Type
- Date - only valid dates can be entered by the user (When will you arrive?)
- Number - a simple number, no letters allowed
- String - a simple text (possibly multiline)
- Display - how the field should be displayed:
- Checkboxes - A list of check boxes (with a related fee if such a field type is selected)
- Multi-line text - simple multiline text box
- Pop up - A pop-up menu
- Text Box - A single line box to enter free text
- Yes/No
- Max Len - maximum length (number of characters) allowed to be entered
- View Len - maximum display length in characters
- Required - Determines whether or not data for this field is mandatory
- Fixed Len - Determines whether or not a fixed length is required for the entered text
Note: first select the data type and save. Then, re-edit the field properties.
Valid Data/Display Types Combinations
If a sort field is present (for multiple items), that will determine the order of items.
Tip: use multiple of tens to be able to "insert" items later on without changing others
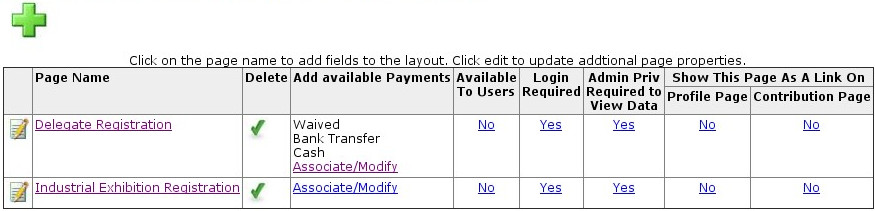
Page Layouts
- green cross: create new page
- notebook+pen icon: get the page properties
- Delete: a cross icon permits deletion. A green mark says "it's in use, cannot delete"
- Available to users: determines whether an unprivileged person can access this page
- Login required: whether or not a login is required to fill in this page
- Admin priv required to view data
- Show this page [...]: where to put links to this page
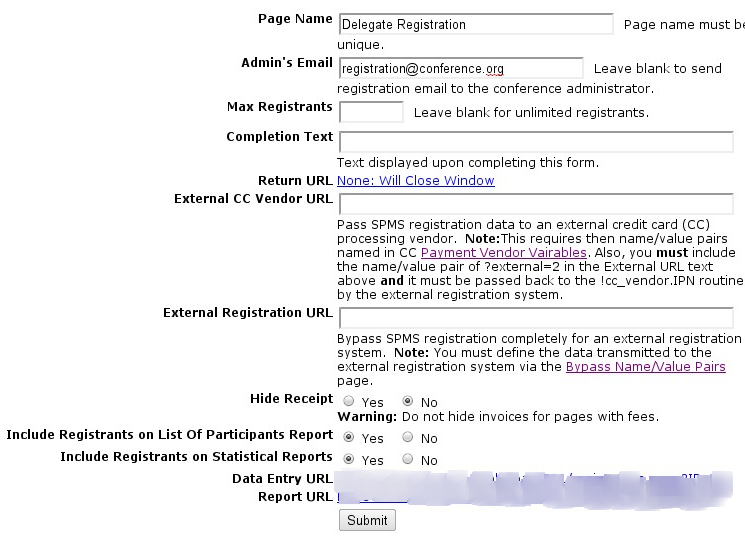
Page Properties
- Admin's email: the address from which all emails sent by the SPMS will come from
- Max Registrants: for closed-number conferences
- Completion Text: additional text to be displayed when the form is submitted.
- Return URL: a URL to redirect the browser to after submission. Normally blank.
- Hide Receipt: whether or not to hide the receipt after submission
- Data Entry URL: useful to send the URL via email, etc.
- Report URL: direct URL to this page's report
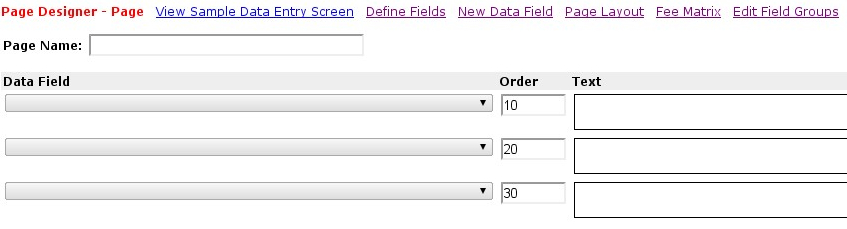
Page Layout
To create a new page click on the big green cross at the top of the page
Then, insert the page name only (do not insert any field) and save.
Now, from the above list, edit the newly created page:
Profile information about the person filling in the form (in particular, their name, email address, and mailing address) are automatically collected, no need to include these data as fields (unless "Login required" is not selected).
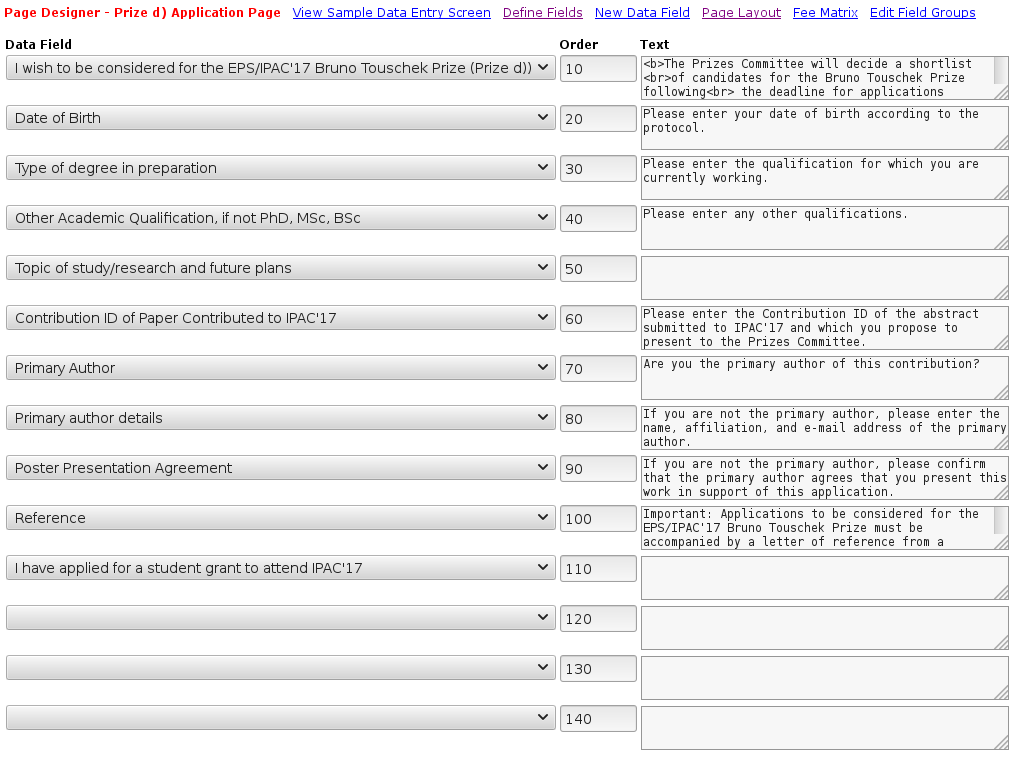
Three columns are present: in the leftmost one there are pop-ups to select the predefined fields from.
The second column is used for fields order (lower numbers first).
The third column is for additional text that will be presented above the field "question".
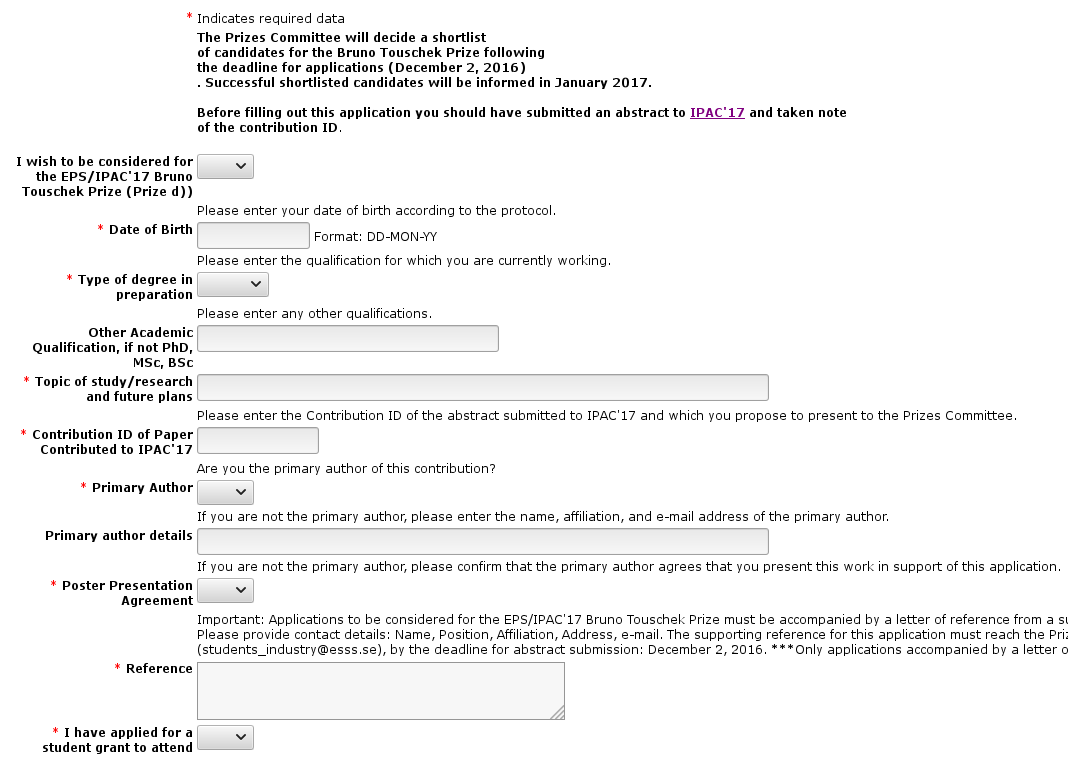
Simple HTML can be inserted there so, for example, to create section titles, link to external images, and so on. Just use the "View Sample Data Entry Screen" link on the top to preview how the page will look.
While editing the page it is useful to click on "View Sample Data Entry Screen" - a new window is opened showing the final result of the entry form.